
Process Workflow for 3D Printed Patient-Specific Medical Devices
- CT (computer tomography),
- MRI (magnetic resonance imaging) or
- CBCT (cone beam computed tomography)
In the next step, imaging data gathered from the scanners will be stored and transmitted by established medical imaging management tool in accordance with a standardized procedure; so called DICOM (Digital Imaging and Communications in Medicine). Almost all manufacturers of imaging or image processing systems in medicine, such as digital x-rays, magnetic resonance imaging or computer tomography, implement the DICOM standard in their products. This enables interoperability between systems from different manufacturers in the clinical environment.
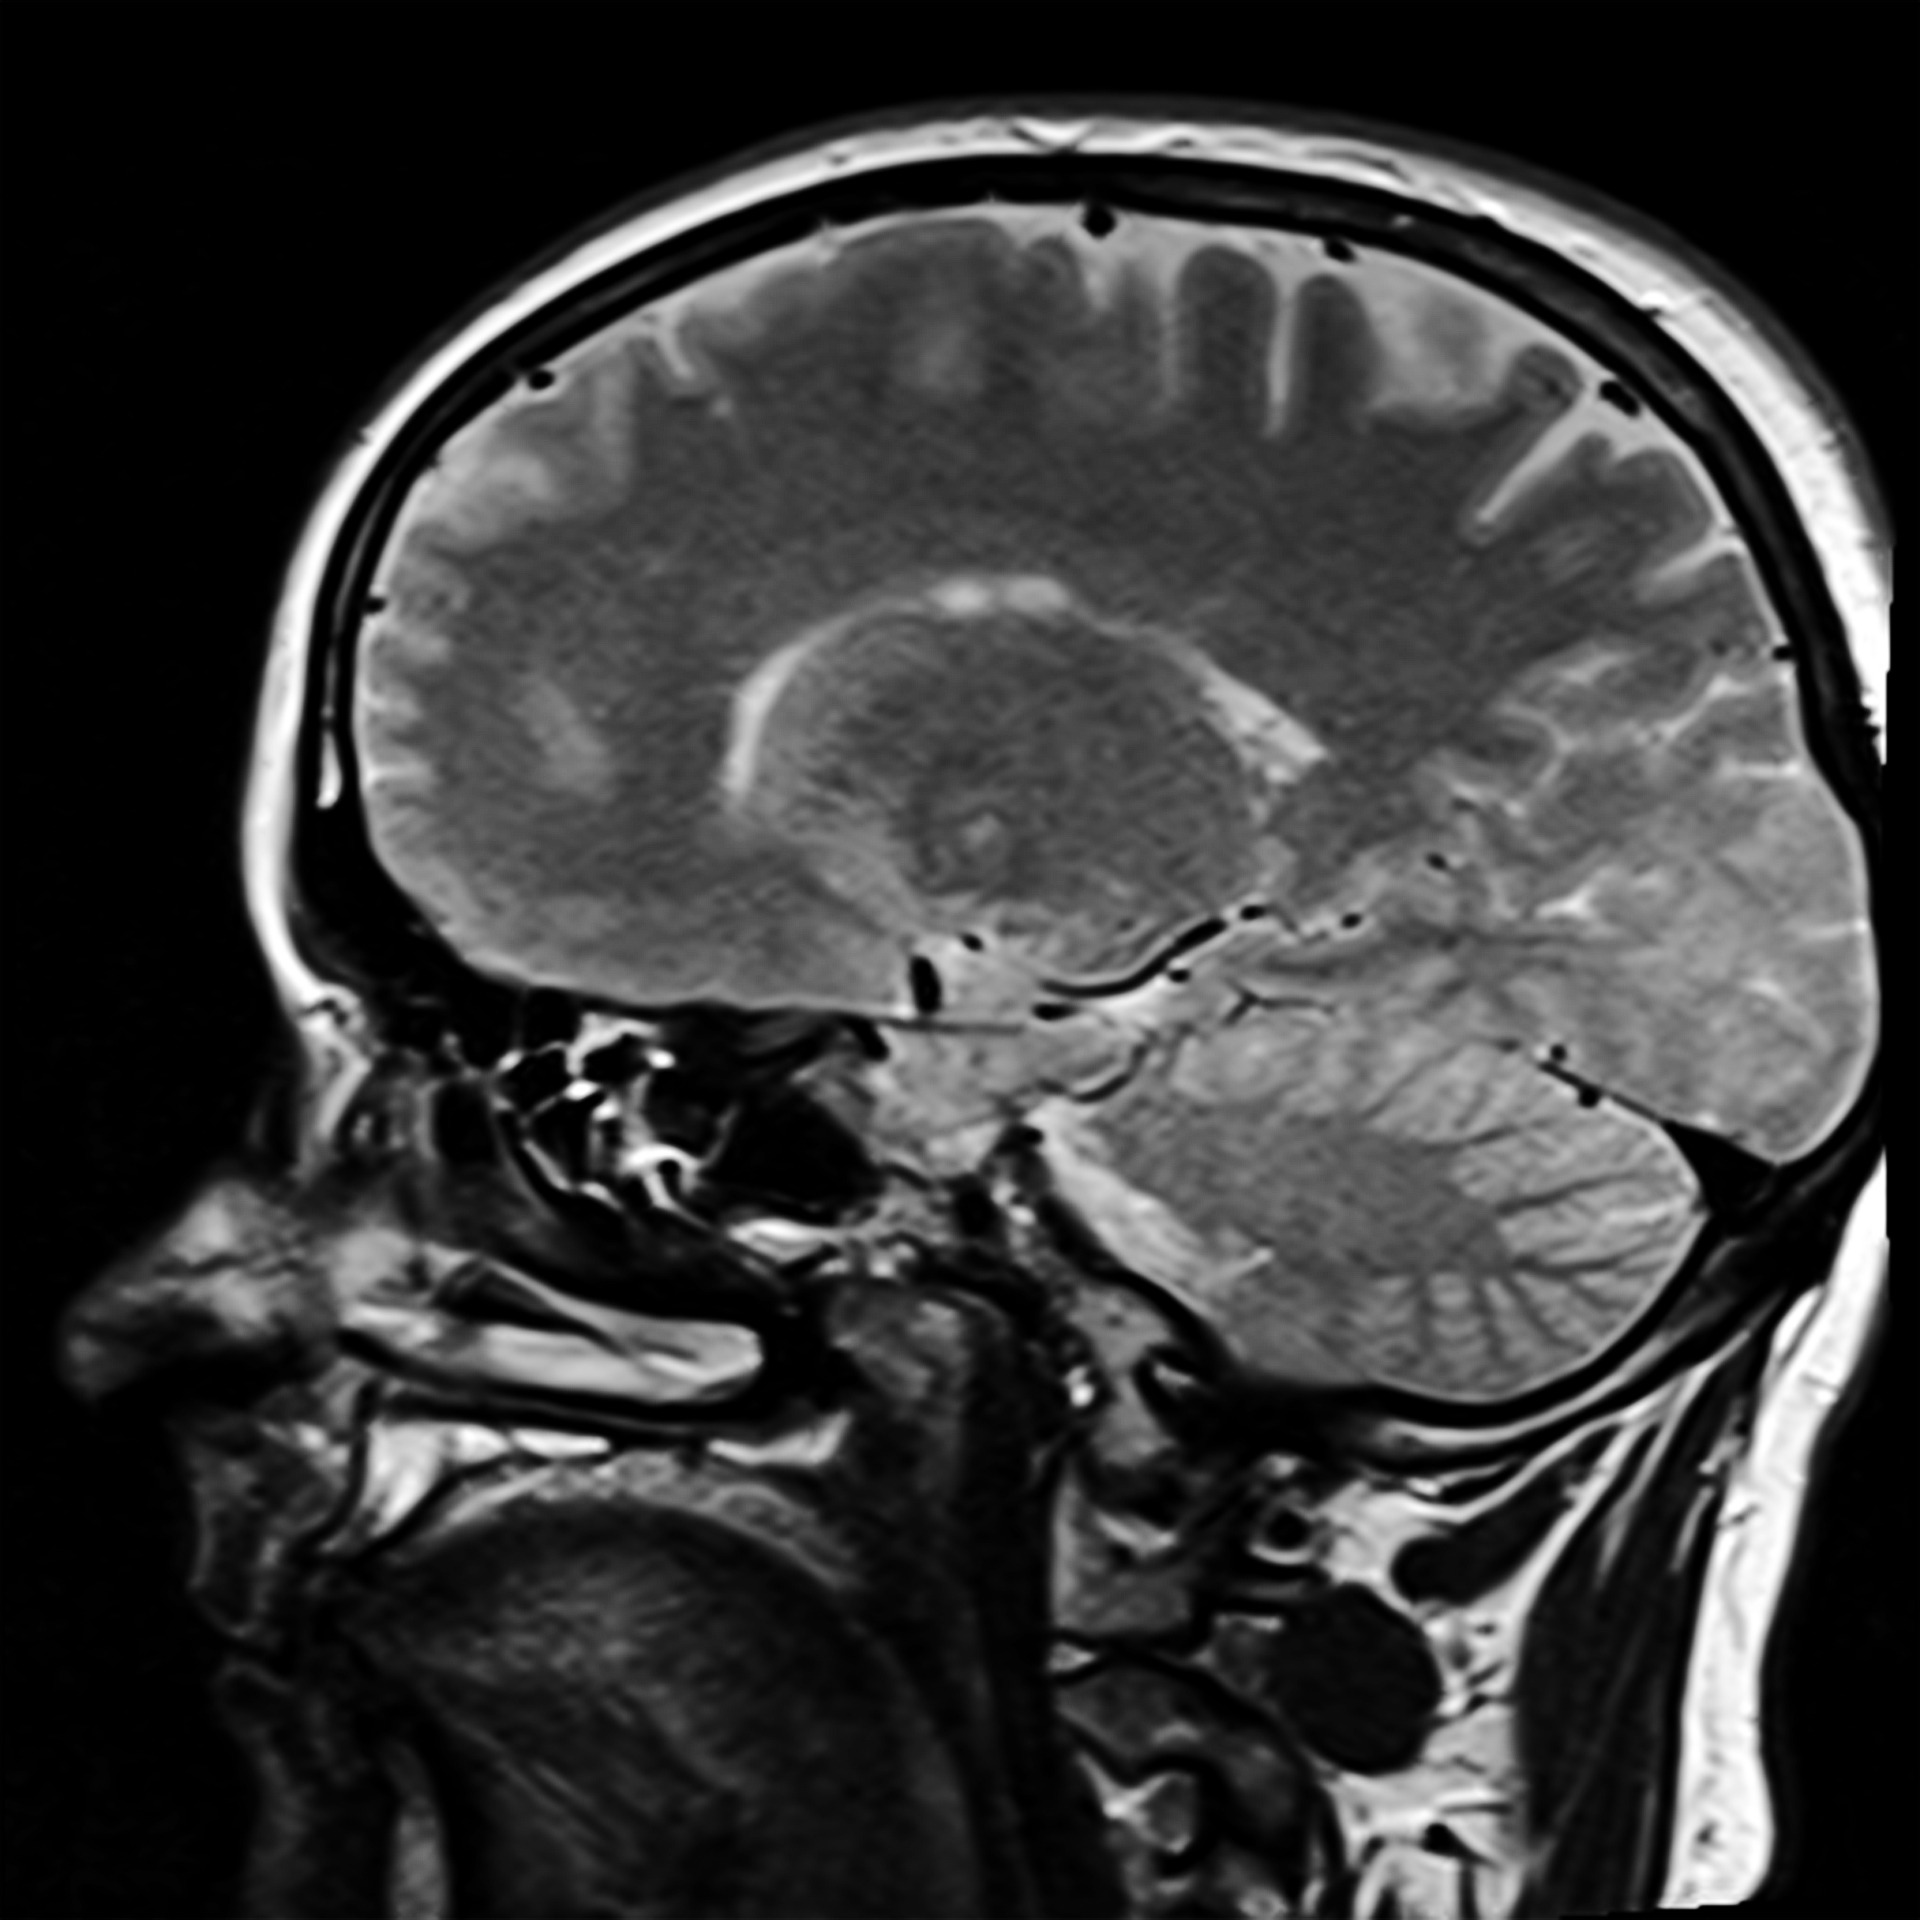
The following step entails segmentation; the image processing. This step represents the first stage in image analysis for further data processing. At this stage, the generated images are divided into relevant and non-relevant regions.
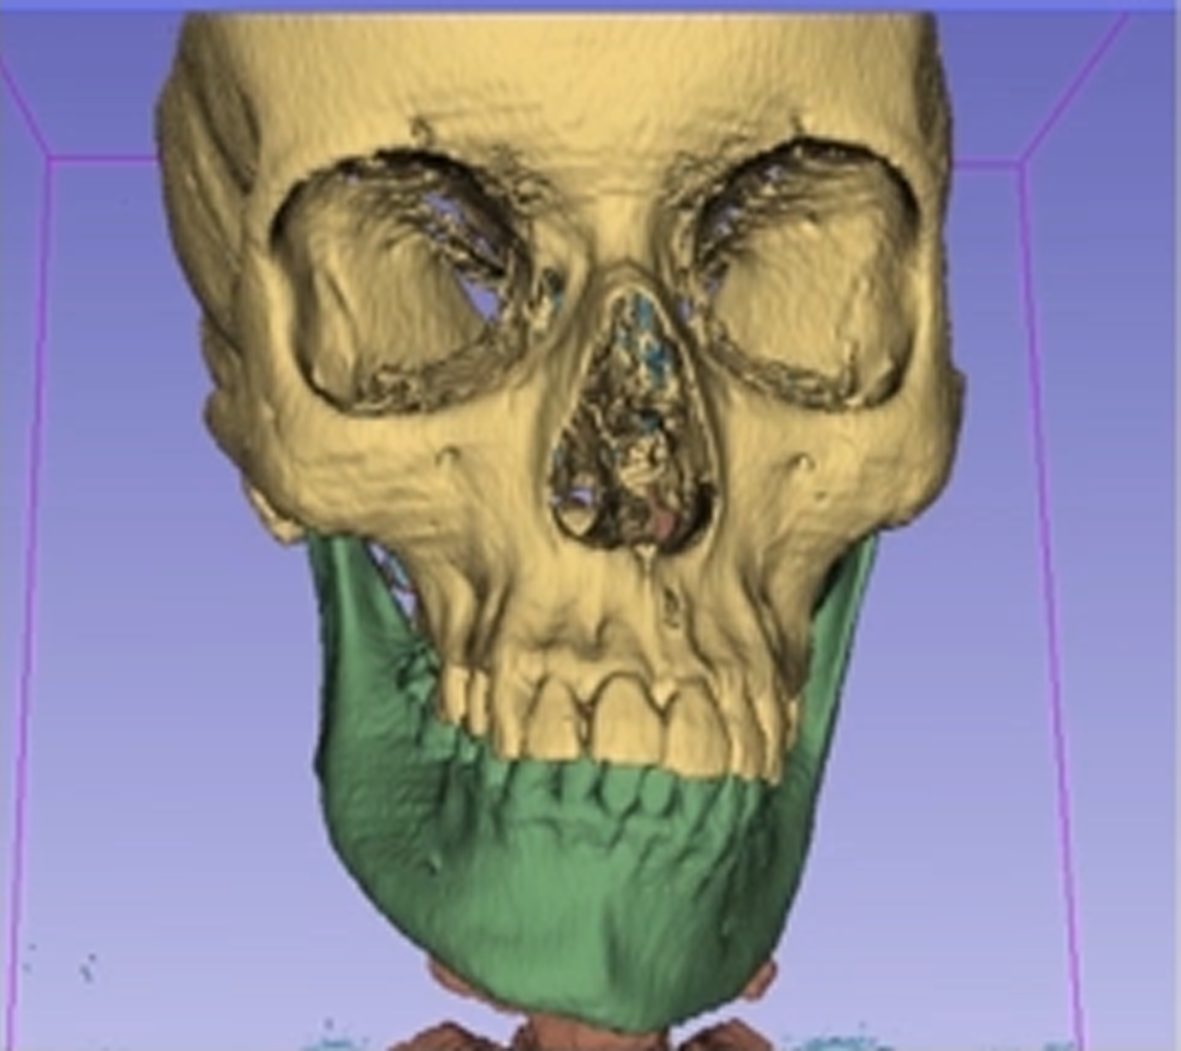
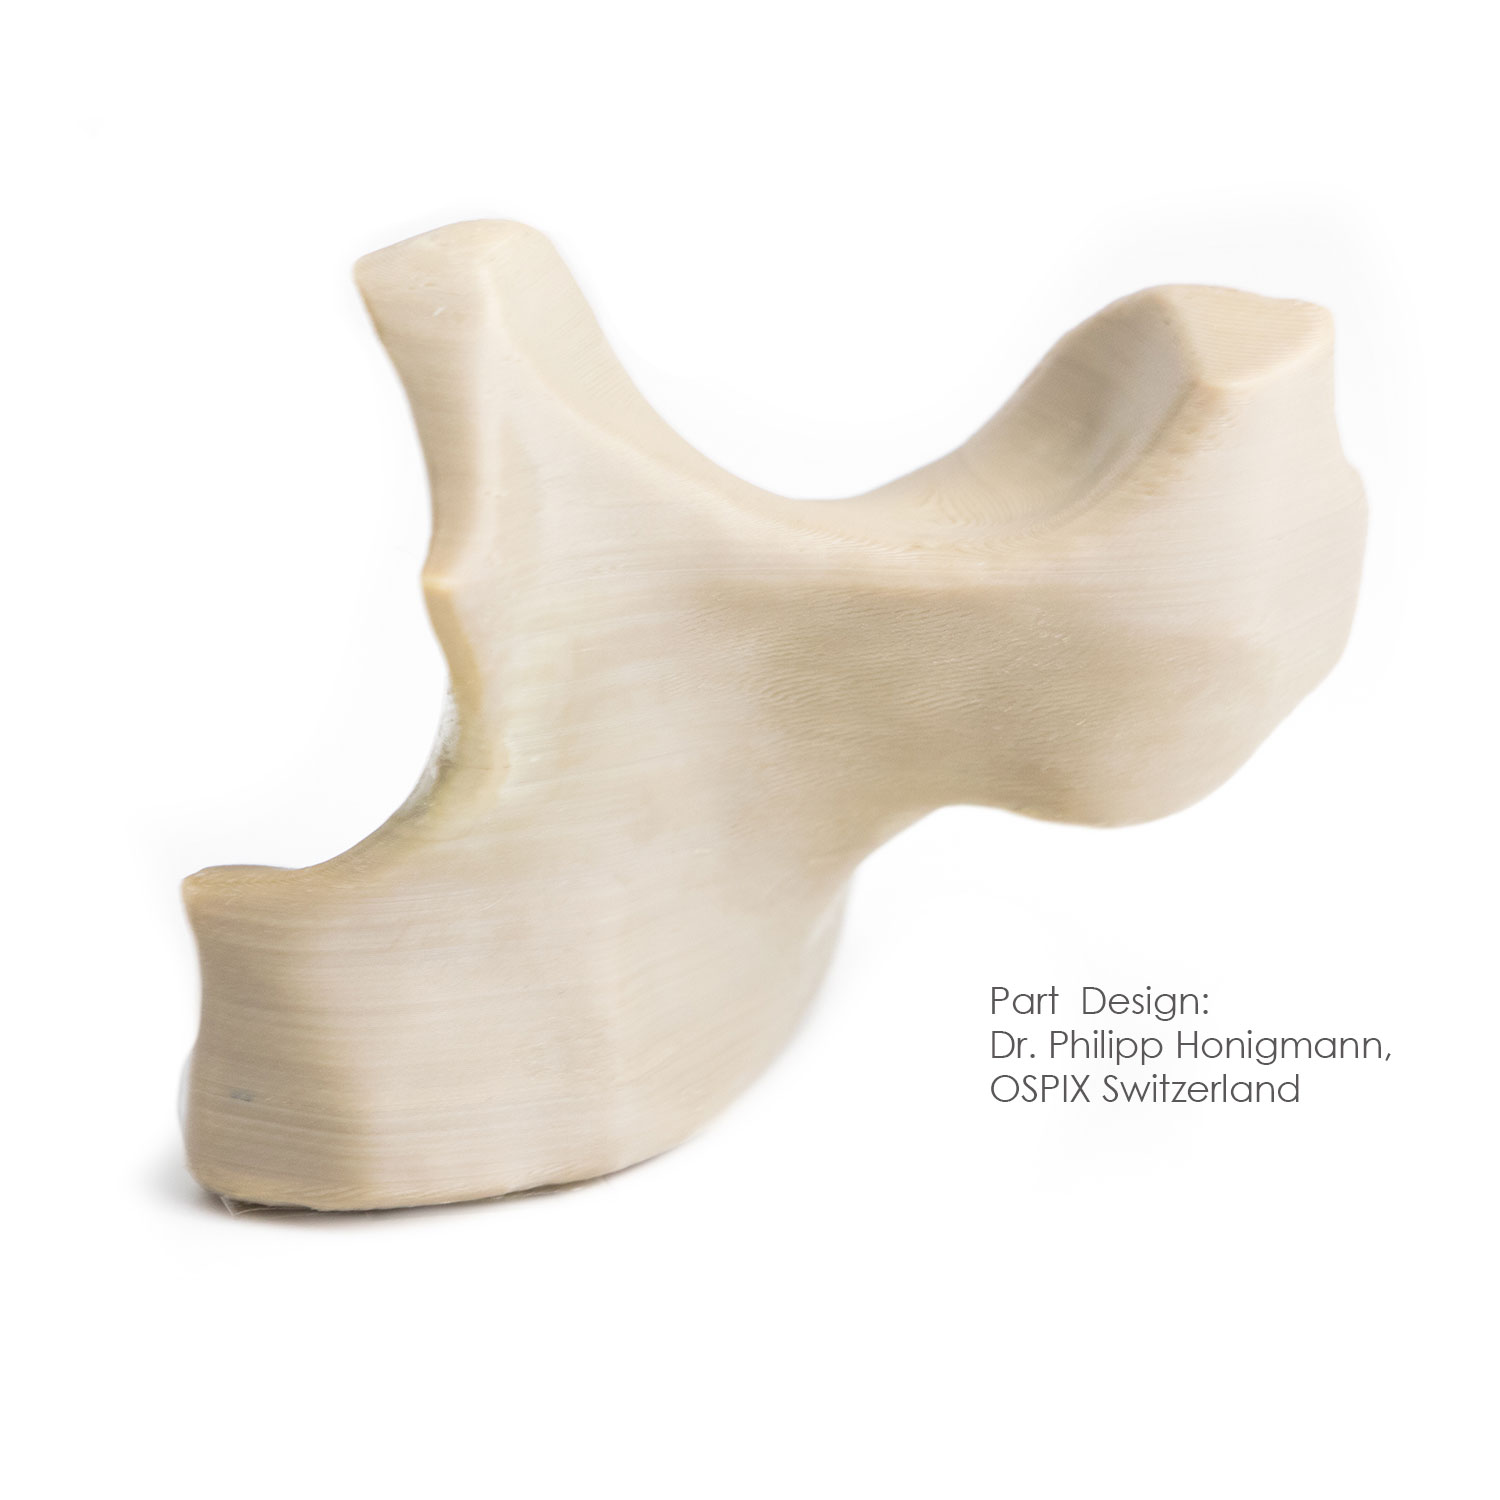
During the subsequent virtual operation planning, the patient’s segmented models can be moved and processed virtually in all three spatial axes. For example, individual sections of the jaw are repositioned in oral surgery so as to achieve an aesthetic and anatomical improvement for the patient. This processing principle is also used to create PEEK implants using 3D printers. Computer-aided simulation, planning and modelling ensure faster operations for the patient and provide a preoperative insight to the expected osteotomy alignment and positioning in advance. Thanks to the gained efficiency compared to conventional model surgery, a smoother, more precise
Before the image data can be read and processed with the 3D printer, a final data handling step is necessary. Slicing software programs “cut” the 3D object into many horizontal slices and thus determine the path that the print head must travel. The result is the so-called G-code file. The G-code also contains data about the print-bed and any hardware directly contributing to the printing process such as thermocouples, travelling speed of the motors driving the print-head as well as information on the feed rate of the filament. Using the path information (X & Y coordinates), slicing software can estimate both the quantity of the material being extruded and the expected print time of the model making it possible to calculate the cost of material used and subsequently monetary value of the print job.
After the printing process, post-processing steps may still be necessary on the printed part, for instance the removal of support material or refurbishing of surface structures. The duration of a 3D-printed model from imaging to the finished printed PEEK implant takes on average less than 24 hours; however, it strongly depends on the geometry and size of the desired model.

surface due to decontamination. Quality objectives thus involves absence of residues (cleanliness), with precise checking that there are no particles or other organic or inorganic substances on the printed part. The cleaned parts is also packaged under strictest conditions and must prevent recontamination of the implant.
Straight to your own Apium M220 Series
Learn more about the extensive opportunities the Apium M220 Series offers and strengthen your medical supply chain with the benefits of Additive Manufacturing.
